
How to Fix Nail Holes in Walls Without Painting
You may want to make the repair to make sure that you get back your deposit on a rental. Alternatively, you might want to sell your home, and a showing’s coming soon. In either case, you don’t want to leave unsightly nail holes exposed on your wall.
If you leave the nail in, it looks even worse than the hole. Accordingly, the only good option is to fill the gaps in your otherwise beautiful wall.
To learn how to fix nail holes in walls without painting, keep reading.
How to Fix Nail Holes in Walls without Painting
If you’ve ever done any work with drywall, you know that it’s a pain to fill pinholes. The job is especially burdensome if you have a lot of them.
Painting over every single nail hole is tedious and time-consuming. Accordingly, you may wonder if there’s a better method.
Well, there most certainly is a faster way. In truth, however, the best way is to bite the bullet and do the hard work needed to fix holes in walls properly. We’ll get to the right way to do the job in a bit.
Still, that’s not why you’re here. You’re here for a quick fix for a small but unattractive problem—and that’s what you’re going to get.
In short, you can fix nail holes with spackle or putty. These compounds will disappear right into pinholes.
What’s more, they’re easy to use. All you need to do is apply them, then let them dry for about 15 minutes. Then, you can wipe the area down with a damp cloth.
You can also use other household items to fill the hole—more on that in a moment. However, there’s a catch.
Unless you have a white wall, your patch job is going to show. Resultantly, you can fill nail holes in a matter of minutes and be done, but only with walls that are painted white.
Gearing Up for the Project
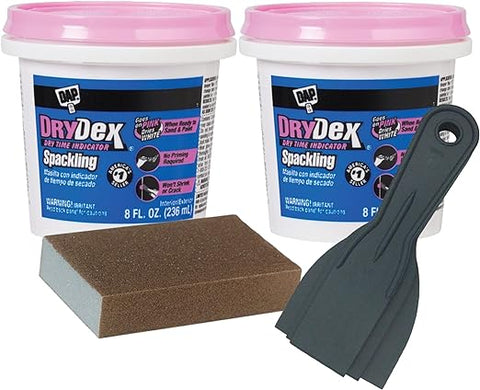
With confidence and enough time, you can fix holes in walls like a pro. Ideally, you’ll want spackle for the job. You’ll also need a little fine grit sandpaper, and—yes—if you want to do the job right, you’ll need paint to match the color of your wall.
You’d begin your mini home improvement adventure by purchasing supplies. However, you don’t need much to fix small nail holes in walls.
At a minimum, you want to get your hands on fine grit sandpaper or a sanding sponge. The sandpaper will enable you to make any damage less obvious.
It’s understandable not to want to paint after fixing a small hole. After all, if you only need to fix one or two small spots, painting makes the job more of a chore.
In that case, it’s understandable if the job doesn’t feel worth the effort. With this in mind, here are a few DIY methods that will save some work —and a trip to the hardware store.
Quick Nail Hole Fixes In a Pinch
Everybody has a tube of toothpaste lying around. You can use toothpaste to fill small nail holes in your wall. It’s the fastest way to get the job done.
Toothpaste is a great quick fix if you’re in a pinch. For example, you may have your landlord coming by in less than an hour to take a look around. In that case, grab whatever you use to keep your teeth shiny and white.

It’s important to note that toothpaste eventually cracks as it dries. Resultantly, it’s no good for filling larger holes, such as those accidentally made by a hammer. However, there’s a trick that will eliminate this problem.
Hopefully, you also have a few aspirins lying around. If so, crushed one or two aspirin and mix them with a small amount of toothpaste.

The mixture will seal the hole and won’t crack. All you need to do is apply the toothpaste to the hole, let it dry, and you’re all set.
Again, without painting, this quick fix method only works with white walls. Also, it will only work with white toothpaste. If needed, a trip to the store for a small tube of white toothpaste is a lot easier than making your way to a hardware store.
Other Quick Fix Alternatives
There also other compounds that you can concoct to make your own homemade spackle. What you choose, however, depends on a few things.
For example, your choice will vary depending on how much time you have. It will also vary based on the wall color and your personal tastes.
For instance, you can use baking soda to make your own homemade spackle-like compound. You’ll need to mix it with white glue.

You should end up with a white, thick paste-like mixture. You’d then use the concoction to fill in any small nail holes.
If the hole is small enough, you can use glue by itself. You’d apply the glue with a Q-tip. If you have kids, for instance, you most likely have some Elmer’s glue lying around that they use for crafts.
If you use glue, it’s important not to get it on the rest of the wall. Remember, your point is to make less work—not more. You’ll also want to put a piece of cardboard under the glue bottle to prevent any spills.
If you’re so unfortunate as to not have any of these items in your home, there’s still hope. You can fill those small nail holes in walls using soap. However, soap is a last-ditch alternative.

Filling holes in walls with soap is not a permanent fix. It’s just a way to cover up damage to your walls quickly if you’re pressed for time.
Here, the process is straightforward. Simply take the soap, shove it into the damaged areas until there are no holes left, make it look nice and you’re done.
Doing the Job the Right Way
If you have time, it’s worth knowing the right way to do the job. This time, you can’t avoid a trip to the hardware store unless you already have everything you need. To fix wall holes properly, you’ll need:
• A putty knife
• A small paintbrush
• Fine-grain sandpaper
• Paint (matched to your wall)
• Spackle

If you’re going to paint, it’s important to order the right color. You can choose the right color by taking a picture of your walls using natural daylight.
Now, compare your picture to your wall. If it’s a good match, you can use your picture to find the right color paint at the hardware store.
Once you have everything for the job, you’re ready to begin. You’d start by putting a small amount of spackle on the corner of a putty knife. Now, you can slowly push the spackle into any nail holes.
When you’re finished, use the flat side of the knife to even out the spackle. You want to smooth the spackle over the nail hole.
Don’t worry if there’s extra spackle. That’s why you have sandpaper.
Now, let the spackle dry for two to three hours. Once it’s completely dry, you can sand the spackle with the fine-grained sandpaper.
Filling Larger Holes in Walls
If you have a larger hole, you’ll need to grab one extra item at the hardware store. You’ll need a pack of self-adhesive fiberglass mesh. Many hardware stores call this material a drywall repair kit.
The fiberglass mesh will give your fix added stability. You’ll typically need a drywall repair kit if you have a hole that’s half an inch or bigger.

For this job, you’ll want to start by cutting a piece of fiberglass mesh that extends about an inch around the hole in all directions. Now, you’ll place the patch right above the hole and press down after removing the backing. The patch should stick to the wall with no problems.
Now, you’ll cover the mesh with spackle. However, you’ll want to give the repair a bit more time to dry.
With a larger hole, you’ll want to wait for 5 to 6 hours to pass —or more if you can. Now, you can sand the wall smooth and apply paint.
Voilà! Your wall is like new again, and you have one less thing to manage.
Small Repairs Can Make a Big Difference
Now you know how to fix nail holes in walls without painting. You’ve also learned the right way to fix a hole in your wall—with paint.
Even if you’re not moving, you might hesitate to rearrange pictures. Fixing small holes is an easy job that isn’t as troublesome as it seems. Nevertheless, you’re not alone in your sentiment.
For some people, filling a hole in the wall can prove challenging. However, if you take your time, the job will turn out fine.
If you need help figuring out other ways to make your home beautiful, Melissa Vickers Design can help. Contact us online to learn more about creating a space that you love.
Hi, I accidentally put picture hangers in the wrong place on my wall. Now you can see the nail holes above the pictures. How do I fix this without having to repaint the entire wall after filling the nail holes as you described above. Thanks